


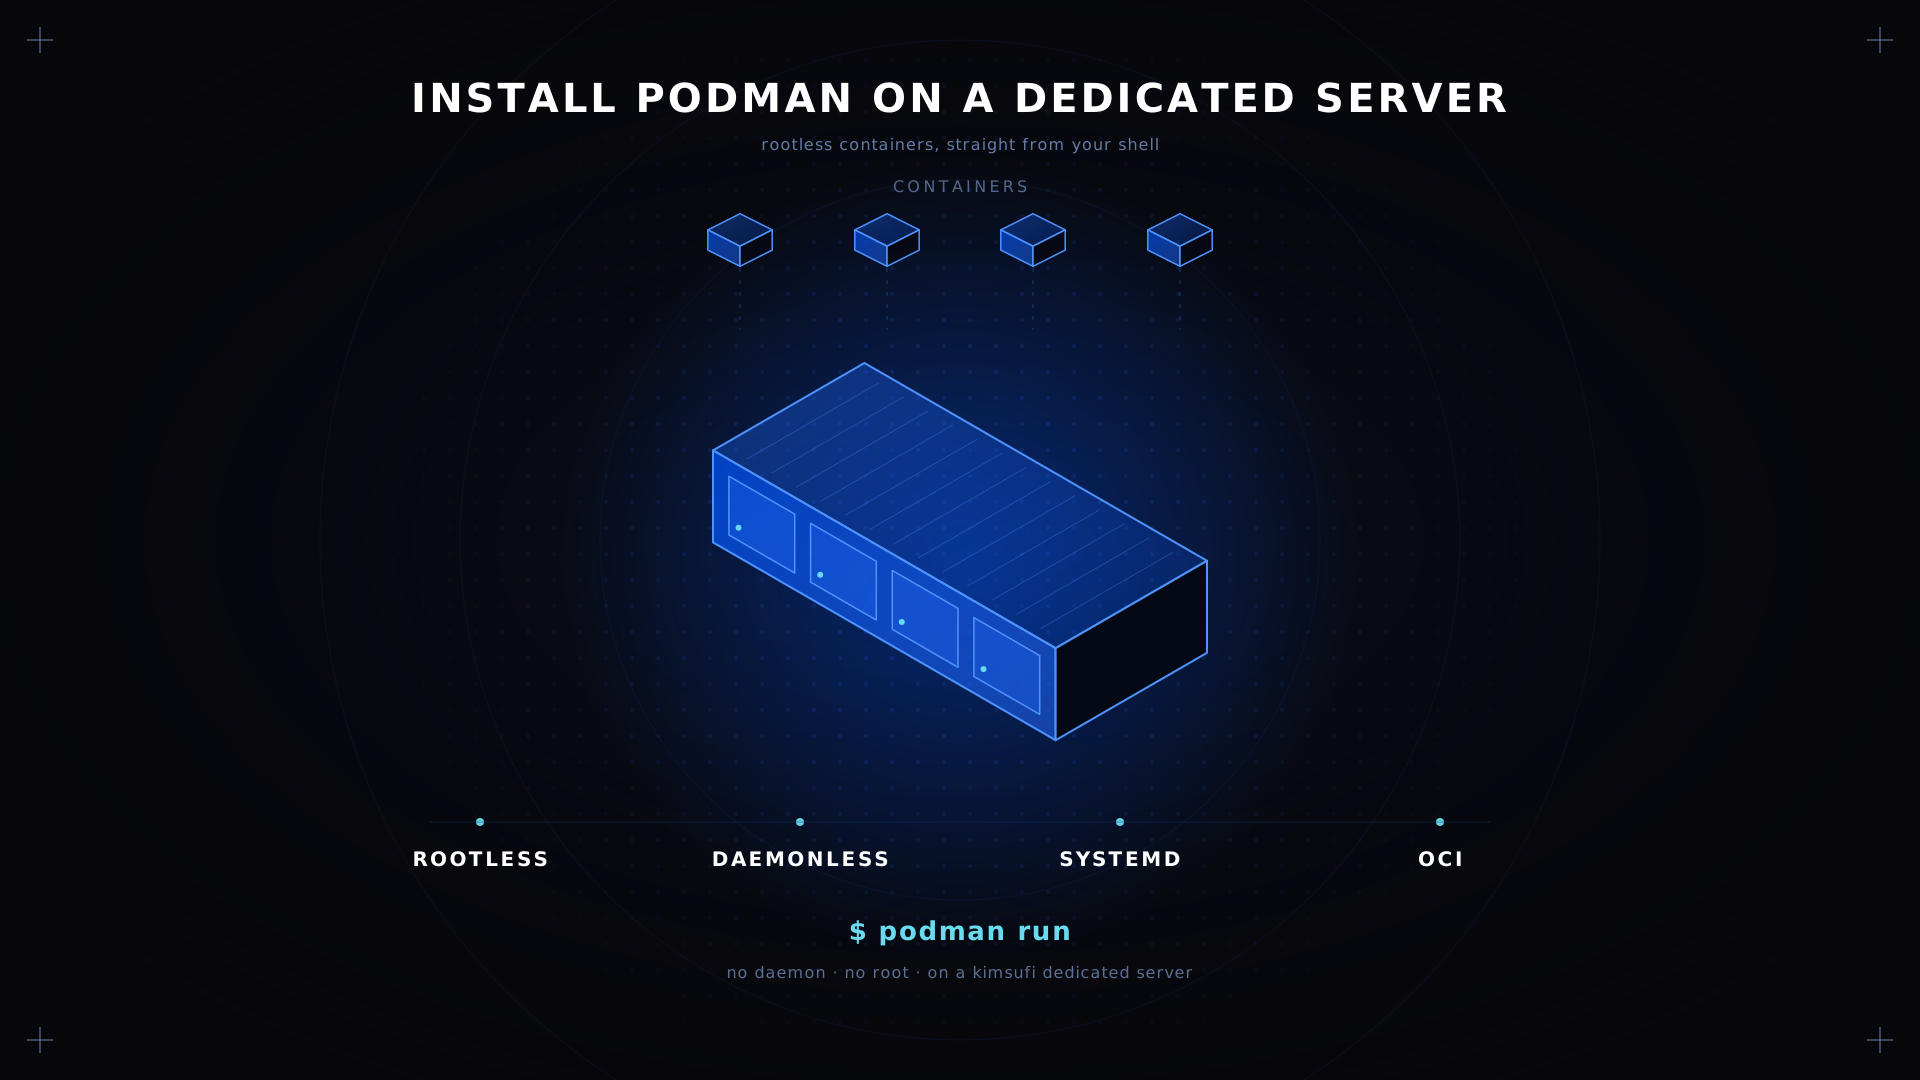
Podman is a daemonless container engine. No background service, no root-owned socket, and every container runs as a child process of your shell. The podman command set matches Docker, reads the same Dockerfile and pulls from the same container registries, so a single shell alias covers most daily work. This guide walks the full install on a dedicated server: the package, a podman-user account, storage, networking, and a systemd service that restarts each container after a reboot. Hardware from $11.10/month.
Key Takeaways
- Install Podman from your distribution repositories:
sudo dnf -y install podmanon Fedora, CentOS Stream and RHEL,sudo apt install -y podmanon Ubuntu and Debian.
- Running without root is the default. A
podman-useraccount plus subuid and subgid ranges is the whole security story, and every later command runs as that account.
- The core podman command set is
podman run,podman ps,podman pullandprune, each matching its Docker equivalent.
- Use Quadlet, not the deprecated generate-systemd command, to turn a container into a systemd service.
- Podman Desktop and the podman machine command cover Windows and macOS, where a Linux VM does the real work.
Prerequisites and supported operating systems
It runs natively on Linux and is the default container engine on Red Hat distributions.
- Fedora, CentOS Stream and RHEL. The package ships in the base repositories, maintained by the distribution.
- Ubuntu and Debian. The package is in the main archive: Ubuntu 24.04 carries 4.9, newer releases a 5.x version.
- Alpine. In the community repositories, for a minimal server build.
- cgroup v2 enabled, which every current release does by default.
You also need root or sudo access over SSH, and the IP address from your provider. The installation itself takes one command on any of these.
On Windows and macOS, Podman has no native port. Windows in particular has no container runtime it can use directly. The podman machine command creates a Linux virtual machine and the client talks to it, so the command set on your PC matches the server exactly. Podman Desktop adds a GUI for people who prefer one. On a Windows PC the VM runs on WSL 2, driven from PowerShell. Open PowerShell as a normal user, no administrator rights needed:
podman machine init
podman machine start
podman version
Each VM is a full Linux system, so a Windows or macOS PC is a dev environment rather than a production machine. Podman Desktop on Windows wraps the same podman command calls in a window, and podman machine stop shuts the VM down when you are done with the PC. Running an app on Windows this way is fine for development; the app you ship still runs on Linux. Podman Desktop also runs on macOS, and the PowerShell commands used on Windows have exact equivalents in the Terminal there. Nothing in this Windows path changes how the app behaves once it reaches the server. Everything below assumes a Linux machine you reach over SSH.
Preparing your dedicated server environment
Match the machine to how many containers it will run. These are current Kimsufi configurations:
| Model | Hardware | From |
|---|---|---|
| Kimsufi KS-C | Xeon E5-1650v2 6c/12t, 32 GB DDR3, 1×120 GB SSD | $13.30 |
| SYS-1 | Xeon-E 2136 6c/12t 3.3/4.5 GHz, 32 GB ECC, 2×512 GB NVMe | $33.20 |
| SYS-2 | Xeon-D 2141I 8c/16t, 32 GB ECC, 2×512 GB NVMe, 1 Gbps unmetered | $42.10 |
| Kimsufi KS-A | i7-6700k 4c/8t 4 GHz, 32 GB DDR4, 1×480 GB SSD | $61.00 |
| Kimsufi KS-GAME | Configurations built for game-server hosting | $32.10 |
A minimal server build is enough: the engine needs no desktop and no extra service. A minimal server configuration is part of the appeal, and easier to audit. Update the base system, then create the account that will own each container. Create it once and every later command runs under it:
sudo dnf -y upgrade
sudo useradd -m -s /bin/bash podman-user
sudo loginctl enable-linger podman-user
Lingering matters more than it looks. Without it, systemd tears down the user session at logout and every container stops with it. Check the account works with sudo -u podman-user id.
Installing Podman on Fedora, CentOS and Ubuntu
Installing from the base repositories is the supported route on every distribution below.
Fedora, CentOS Stream and RHEL. One command:
sudo dnf -y install podman containers-commonOn CentOS the same sudo dnf -y install line pulls everything, because CentOS tracks RHEL packaging directly. Older CentOS releases used yum, where the equivalent yum line behaves identically. CentOS Stream and RHEL share the dependencies listed below.
Ubuntu and Debian. The apt install is equally short:
sudo apt update
sudo apt install -y podman uidmap
On Alpine the apk equivalent does the same on a minimal server.
The install pulls the dependencies listed below, and they are worth knowing because the troubleshooting later refers to them:
- conmon monitors each container process and relays its logs. One conmon runs per container, so a machine with ten running containers has ten conmon processes. A missing conmon binary is the most common broken install.
- crun or runc is the OCI runtime that launches the container process. crun is the faster C implementation; runc is the Go original, still the fallback on Debian-based systems, and either runtime works the same from the command line. Check which runc or crun binary is in use before filing a bug.
- containers-common supplies the default container registries list and the signature policy, so every registry you pull from resolves there. Add your own registry to that registries file when you host a private one, and keep public registries first in the search order.
- slirp4netns and fuse-overlayfs supply network and storage for each container when running without root.
Check which runtime the installation picked with podman info --format '{{.Host.OCIRuntime.Name}}'.
💡 Tip Building from source is rarely worth it, but if you need an unreleased feature, sudo dnf builddep installs the build dependencies and the git repository has the rest. Stick to packaged releases on a production machine.
Setting up rootless Podman for enhanced security
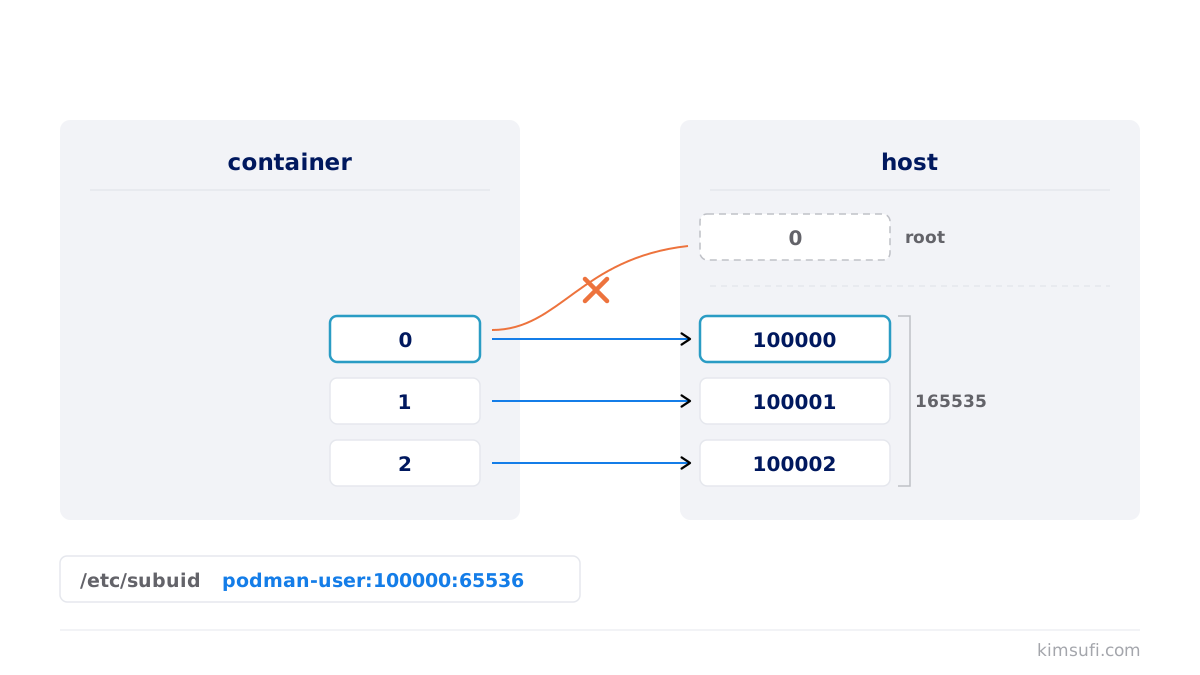
A container started by an ordinary account maps its UIDs onto an unprivileged range. Confirm the ranges exist:
grep podman-user /etc/subuid /etc/subgid
sudo usermod --add-subuids 100000-165535 --add-subgids 100000-165535 podman-user
Then, as that account, pick up the new config:
sudo -u podman-user podman system migrate
sudo -u podman-user podman info --format '{{.Host.Security.Rootless}}'
The last command returns true. If it returns false, the subuid range is missing or the migrate command never ran. Those two commands are the entire setup.
Verifying the installation and basic commands
podman run --rm quay.io/podman/helloThat command confirms the installation. The hello image prints a message and removes itself. That one command proves the whole chain: the registry is reachable, storage initialised, and runc or crun can launch a container process.
podman pull docker.io/library/nginx:alpine
podman ps -a
✅ Expected result The version command prints a release number, and the hello container runs with no sudo and no permission error. Run podman ps -a to confirm it exited cleanly.
Managing containers with podman run, ps and prune
Start a container, publish a port, and check it:
podman run -d --name web -p 8080:80 docker.io/library/nginx:alpine
podman ps
curl -I http://localhost:8080
podman ps lists running containers and podman ps -a includes stopped ones, so the two together show every container on the machine. That output matches Docker exactly, which is why most scripts need no change. The real gap sits underneath, in how Docker and Podman differ on daemons and privileges. Run it after every change until the output feels familiar, and add -a when a container has already exited.
podman stop web
podman ps -a
podman rm web
podman prune -f
podman ps
The prune command reclaims stopped containers, unused networks and dangling images. On a busy machine it is what keeps the disk from filling, so a later section schedules a podman-prune timer. Use --format "{{.Names}} {{.Status}}" for a short status line rather than the full table.
💡 Tip A container without root cannot bind a port below 1024, so publish high and put a reverse proxy in front. Lower net.ipv4.ip_unprivileged_port_start only if you understand what you are opening.
Configuring storage drivers and overlay filesystems
Without root privileges, the engine cannot use the kernel overlay driver directly, so it falls back to fuse-overlayfs, a userspace implementation that needs the /dev/fuse dev node.
sudo dnf -y install fuse-overlayfsThe info command reports the active driver under .Store.GraphDriverName.
Storage configuration lives in ~/.config/containers/storage.conf, where the mount program is declared:
[storage]
driver = "overlay"
[storage.options.overlay]
mount_program = "/usr/bin/fuse-overlayfs"
Recent kernels support native overlay without fuse, which is faster. Check the info command after an upgrade: if the mount program entry is gone, the kernel handles the mount itself. A bind mount works either way, and -v /srv/data:/app/data mounts a directory into the app container. Keep each mount explicit rather than mounting a whole dev tree.
Networking setup: ports, firewalls and slirp4netns
A container running without root gets its network through slirp4netns, a userspace stack, or pasta on newer releases. Neither needs privileges.
sudo dnf -y install slirp4netns
podman run -d -p 8080:80 --name web docker.io/library/nginx:latest
Publishing a port opens it on the machine, so the firewall still applies:
sudo firewall-cmd --add-port=8080/tcp --permanent
sudo firewall-cmd --reload
On Debian-based systems, sudo ufw allow 8080/tcp does the same. Put a reverse proxy on 443 and keep every container port closed to the internet. An nginx proxy is the usual choice, and because that proxy runs as a container too, the whole app stack stays in one place. Point the proxy at the app container by name and the two resolve over the internal network.
Automating Podman services with systemd
Quadlet is the current answer. You write a short declarative file and systemd generates the real service at boot. Create web.container in ~/.config/containers/systemd/:
[Container]
Image=docker.io/library/nginx:alpine
ContainerName=web
PublishPort=8080:80
AutoUpdate=registry
[Service]
Restart=always
[Install]
WantedBy=default.target
Then reload the user manager and enable the app service. The --user flag on every systemctl command is what keeps this unprivileged:
systemctl --user daemon-reload
systemctl --user enable --now web
systemctl --user status web
systemctl --user restart web
systemctl --user list-units --type=service
For housekeeping, a podman-prune timer keeps the disk under control. Create podman-prune.service calling podman system prune -af, then create podman-prune.timer on a weekly schedule and enable it:
systemctl --user enable --now podman-prune.timer
systemctl --user list-timers
systemctl --user status podman-prune.timer
systemctl --user cat podman-prune.service
That timer pair is the most useful automation on a container machine, because unused layers accumulate silently. Check its status after a week to confirm the job fired.
⚠️ Warning The older generate-systemd command still exists but is deprecated. It writes a static unit hardcoding a container ID, which breaks the first time you recreate that container.
Integrating Podman with Ansible for repeatable deployments
Once more than one machine runs containers, drive it from Ansible rather than by hand. The containers.podman collection covers images, each container, pods and systemd generation:
ansible-galaxy collection install containers.podmanA minimal task set installs the package, then starts the app container:
- name: Install Podman
  ansible.builtin.package:
    name: podman
    state: present
- name: Run the web container
  containers.podman.podman_container:
    name: web
    image: docker.io/library/nginx:latest
    state: started
    ports: "8080:80"
Run it against a new machine and you get the same result every time, on CentOS and Debian alike, because the module resolves the right manager. Ansible makes installs repeatable, but it does not move containers off a failed node. That job belongs to an orchestrator, and our Kubernetes and Docker comparison shows when you need one.
Security hardening: AppArmor, seccomp and user namespaces
User namespaces do the heavy lifting. A process that believes it is root inside the container maps to an unprivileged UID on the host. That mapping is why the setup above is worth the effort.
seccomp filters which syscalls a container may make. A default seccomp profile applies to every container, so keep it and write a custom seccomp profile rather than disabling it:
--security-opt seccomp=/path/to/profile.jsonA container that fails after a seccomp change is almost always blocked on one syscall, visible in the journal.
AppArmor on Debian-based systems, SELinux on CentOS and RHEL, confine what each container can touch on the filesystem. Both are enabled by default and both are worth leaving alone. AppArmor profiles live in /etc/apparmor.d/, and a container blocked by AppArmor logs the denial there.
Drop capabilities. Add --cap-drop=ALL to the run command and add back only what the app needs. Most web containers need none.
Close every port you do not serve, and keep the firewall rules as tight as the container config.
Common troubleshooting scenarios
| Symptom | Cause | Fix |
|---|---|---|
| cannot find UID/GID | No subuid or subgid range | Add the range, then run the migrate command |
| Containers die at logout | Lingering not enabled | sudo loginctl enable-linger podman-user |
| bind: permission denied | Cannot use a port below 1024 | Publish above 1024, or use an nginx proxy |
| short-name did not resolve | No default registry configured | Use the full registry name, or list your registries in config |
| Quadlet file ignored | Wrong directory | It belongs in ~/.config/containers/systemd/, then reload |
| Disk filling steadily | No prune schedule | Enable the podman-prune timer |
| Slow image extraction | fuse-overlayfs in use | Check whether your kernel supports native overlay |
| conmon not found | Broken dependencies | Reinstall the package and its dependencies |
Conclusion
You now have the engine installed from your distribution repositories, running as podman-user without root, with storage and networking configured, each container managed by systemd, and the podman-prune timer keeping the disk in check. The hard parts of the installation are the subuid ranges and the Quadlet file locations, and both are one-time work. From here it is ordinary container management: pull an image, run a command, create a unit.
Deploy your containers on bare metal Kimsufi dedicated servers from $11.10/month. Full root access and built-in DDoS protection.
FAQ
Do I need sudo to install Podman?
Yes, for the install itself: sudo dnf -y install podman on CentOS or sudo apt install -y podman on Ubuntu write to system directories. After that you need no sudo at all. Every later command runs as that account, so running each container, pulling images and managing systemd user services happen unprivileged.
Which is faster, Podman or Docker?
Once a container is running they are effectively identical, because both use the same kernel primitives and the same runc or crun runtime. The daemonless design starts a single container marginally faster, since there is no client-to-daemon round trip, and uses no memory at idle. Docker's BuildKit is still ahead on large multi-stage builds.
How to install Podman using Homebrew?
On macOS, brew install podman installs the client, then podman machine init and podman machine start create the Linux VM that runs each container. Homebrew works on Linux too, but the distribution package is the better route on a server, and a podman machine is unnecessary there.
Can I install both Podman and Docker?
Yes, on the same machine with no conflict: they keep separate image stores and separate storage directories. The one rule is never to point them at the same path. Our guide on installing Docker on a dedicated server covers that side, and running both is common during a migration.