



Redis is an open-source, in-memory data store used as a database, a cache and a message broker. It answers most queries in under a millisecond because everything lives in memory, which makes RAM the main resource to size. Running Redis on bare metal gives it all of that memory, with no noisy neighbors and no per-gigabyte cloud billing. This tutorial follows the official installation instructions, docs and client libraries guidance on Ubuntu, Debian and AlmaLinux, then covers security, durability, tuning and monitoring for a production setup. New to bare-metal hosting? Our hosting guide for beginners covers the basics. Plans begin at $11.10/month.
Key Takeaways
- Use the official packages.redis.io repository on Ubuntu and Debian, or the Remi repository on AlmaLinux, to get a current Redis version with security fixes.
- Redis listens on localhost only by default. Keep it that way, set a strong password, and open port 6379 only to your application servers.
- Choose durability on purpose: RDB snapshots, an append-only log, or both, depending on how much data loss you can accept.
- Tools required: SSH access with sudo, and about 20 minutes.
Prerequisites: What You Need Before Starting
- A Linux machine with Ubuntu 24.04, Debian 12 or AlmaLinux 9, installed from the control panel template. All three have official support in the Redis documentation and are listed as tested platforms.
- SSH access as root or as a user with sudo.
- Enough RAM for your data set, plus headroom. Redis stores everything in memory, so a 10 GB data set needs well over 10 GB of RAM once you count fork overhead for persistence. Our guide to choosing server RAM explains memory types and capacity.
- A firewall you can configure. Our firewall configuration guide covers the rules.
A VPS or a virtual machine works for a test deployment, but production workloads benefit from physical RAM and NVMe storage: a VPS shares memory bandwidth with other tenants, while bare metal gives all resources to your workloads, with flat latency under load. To size hardware for a larger data tier, see our guide to choosing a database server.
Step 1: Update the Operating System
Connect over SSH and update the package index and the installed software:
sudo apt update && sudo apt upgrade -y
sudo apt install -y lsb-release curl gpg
On AlmaLinux, run sudo dnf update -y. Older RHEL-based guides use sudo yum install; on current releases, dnf replaces yum with the same syntax. If the update installs a new kernel, reboot before you continue.
Step 2: Add the Redis Repository and Install the Package
Distribution repositories often ship an older Redis version. The official repository from Redis, the company behind the project, tracks the current stable release.
On Ubuntu and Debian, add the signing key and the repository, then install the package:
curl -fsSL https://packages.redis.io/gpg | sudo gpg --dearmor -o /usr/share/keyrings/redis-archive-keyring.gpg
sudo chmod 644 /usr/share/keyrings/redis-archive-keyring.gpg
echo "deb [signed-by=/usr/share/keyrings/redis-archive-keyring.gpg] https://packages.redis.io/deb $(lsb_release -cs) main" | sudo tee /etc/apt/sources.list.d/redis.list
sudo apt-get update
sudo apt-get install redis
The keyring file lets apt verify every package it downloads, so a tampered package never installs.
On AlmaLinux and other RHEL-based systems, use the Remi repository, a community project that publishes current Redis builds as module streams:
sudo dnf install -y https://rpms.remirepo.net/enterprise/remi-release-9.rpm
sudo dnf module enable -y redis:remi-8.10
sudo dnf install -y redis
On RHEL 10 and its rebuilds, the base repositories ship Valkey, a Redis fork, instead of Redis.
Additional options. You can also compile Redis from source with make after you install build tools (build-essential on Ubuntu), or create a container from the official Docker image with docker run -d -p 127.0.0.1:6379:6379 redis:8. A Docker deployment suits a container stack; the repository approach, with official support for updates, is the simplest to maintain.
Step 3: Start and Enable the Redis Service
The Ubuntu and Debian build registers a systemd service named redis-server; on AlmaLinux it is redis, and the configuration file sits in the same directory. To start the Redis service now and enable Redis at every boot:
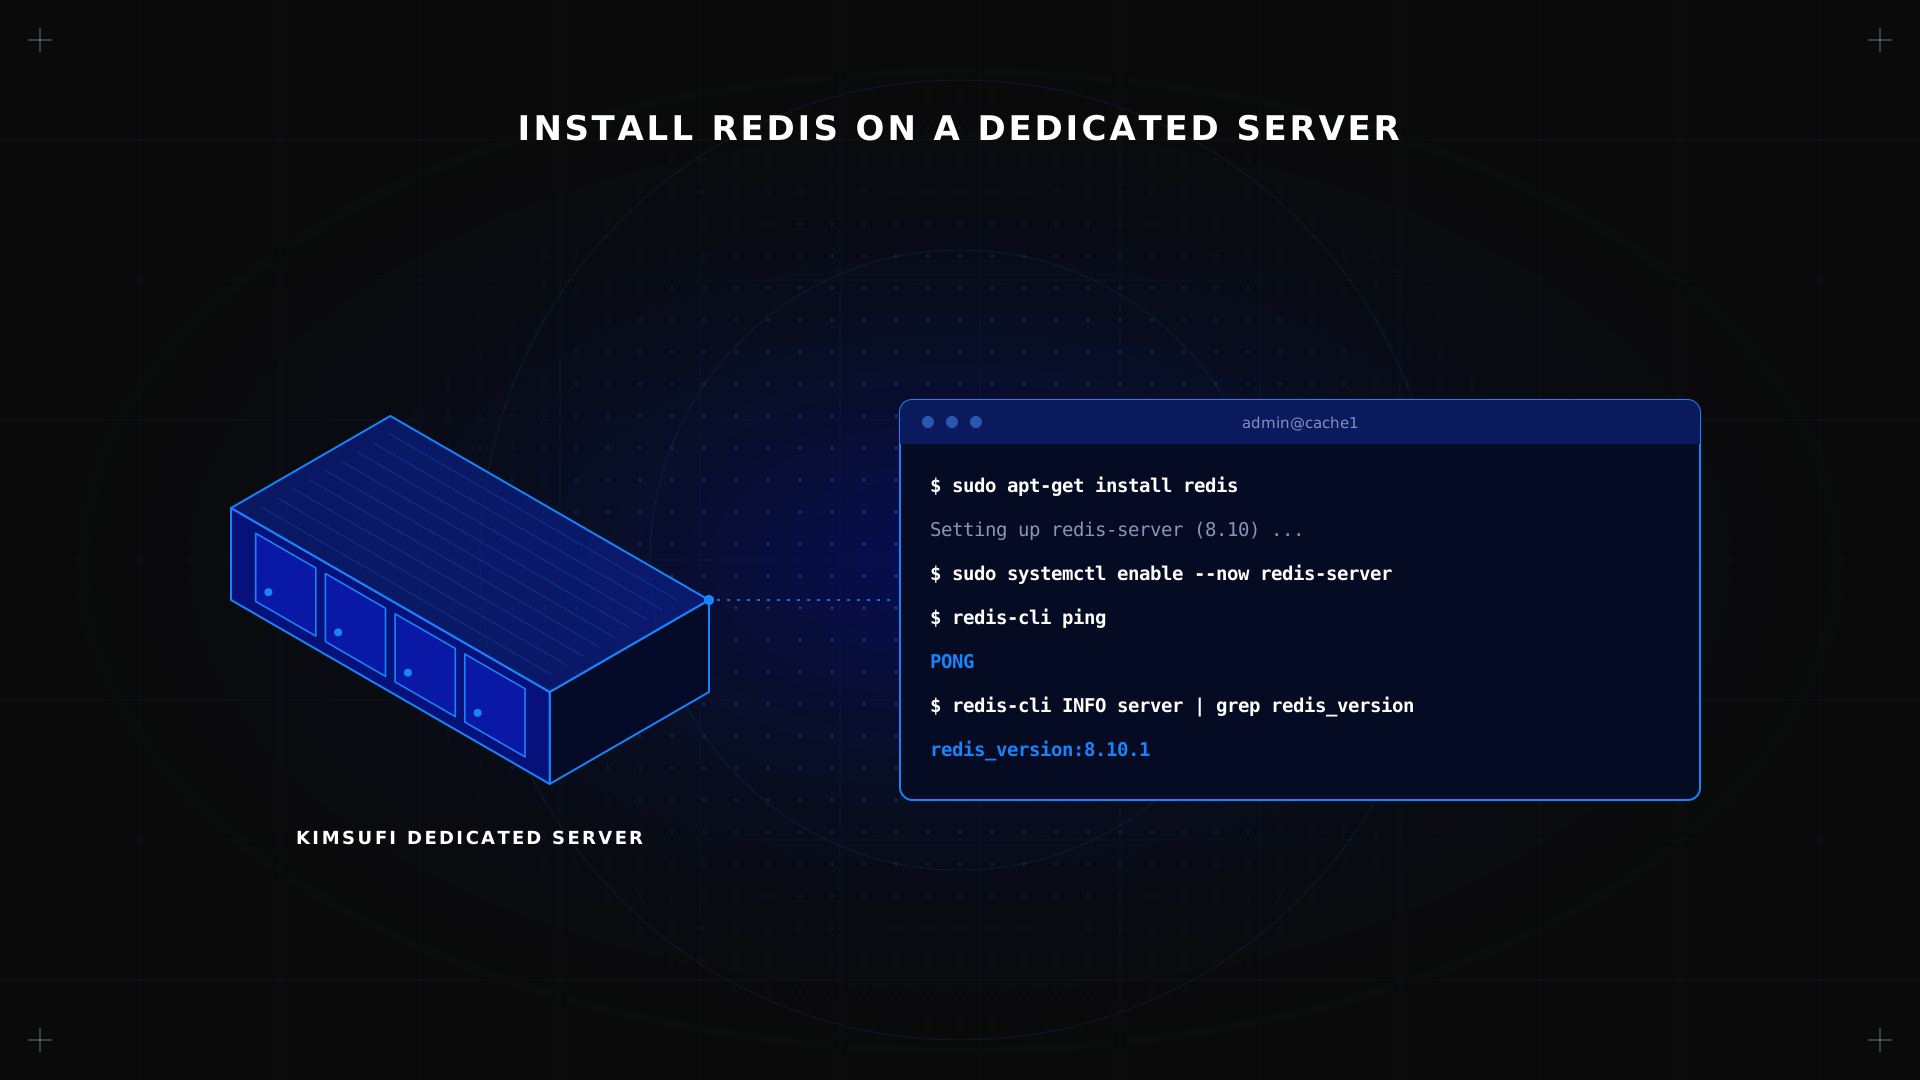
sudo systemctl enable --now redis-server
sudo systemctl status redis-server
✅ Expected result active (running) in the status output: the Redis server is running and listening on port 6379.
After any change to the configuration file, restart Redis with sudo systemctl restart redis-server. That completes the Redis installation itself.
Step 4: Verify the Installation with the Redis CLI
The install includes redis-cli, the command-line client. Use it to connect to Redis and test the installation:
redis-cli ping
redis-cli SET test "hello"
redis-cli INFO server | grep redis_version
A PONG reply to ping confirms the server is running and accepts connections. The INFO server command shows the version you installed. Client libraries use the same API, so your code connects the same way once the test passes.
Step 5: Secure Redis (Bind, Authentication, and Firewall)
Redis was designed for trusted networks, and an exposed instance with no password is a classic cause of breaches, so configure Redis security before you write real data. Every setting lives in one configuration file, /etc/redis/redis.conf.
Bind to the right address. Keep the default bind 127.0.0.1 -::1 if only local applications use Redis. If other machines must connect, add the private address of this host, never 0.0.0.0 on a public interface.
Keep protected mode on. protected-mode yes, the default, refuses connections from other hosts when no password exists.
Set a strong password. Generate one and add it to the config:
openssl rand -base64 32
requirepass <your-generated-password>
For finer control, Redis ACLs give each application a separate user with only the commands it needs.
Firewall the port. Allow port 6379 only from your application servers, for example sudo ufw allow from 203.0.113.20 to any port 6379. These steps prevent unauthorized access even if one layer fails, on a VPS as on bare metal. Restart Redis to apply the settings.
Step 6: Configure Persistence (RDB & AOF)
By default, Redis keeps everything in memory and saves snapshots to disk at intervals. Redis persistence comes in two modes; pick the one that matches your tolerance for data loss:
| Mode | How it works | Data loss on crash | Best for |
|---|---|---|---|
| Snapshots | Periodic copy of the whole data set | Minutes of writes | Caching, fast restarts |
| Append-only log | Log of every write | About one second | Each session store, queues, primary data |
| Both | Snapshot plus log | About one second | Production data store |
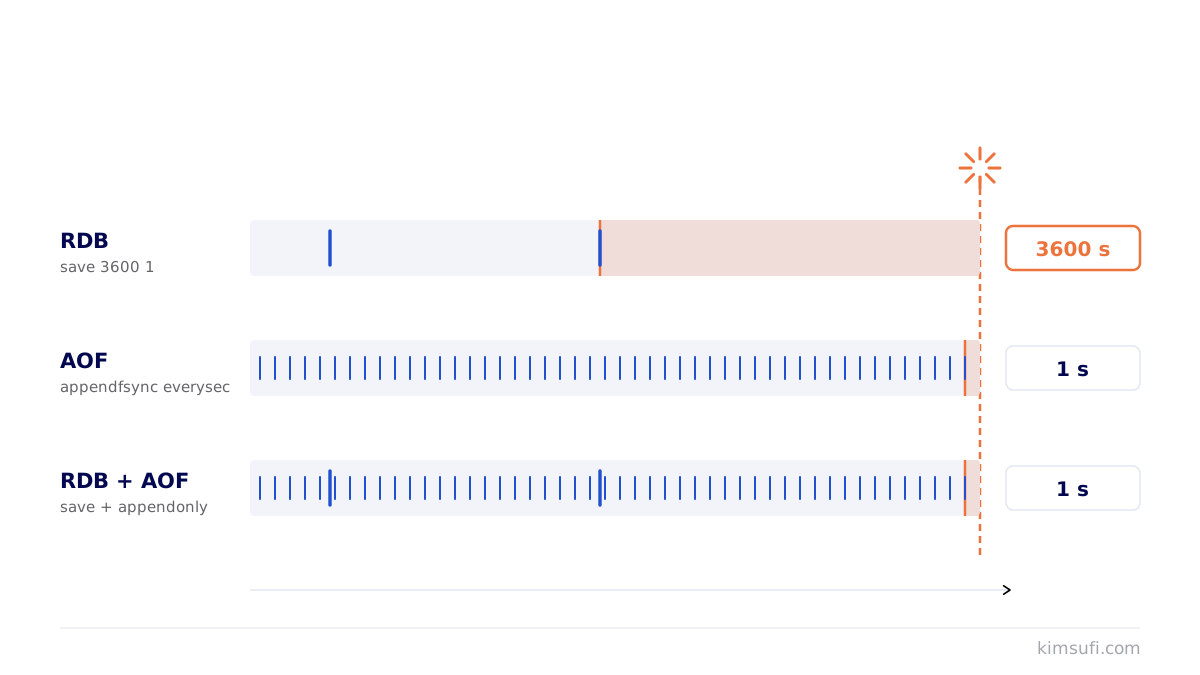
Snapshots. The save directive in the configuration defines when Redis writes a snapshot, for example save 3600 1 300 100 60 10000. Files go to the directory named by dir, usually /var/lib/redis, a directory owned by the redis user.
AOF persistence. Enable it with:
appendonly yes
appendfsync everysec
With everysec, Redis flushes the log once per second, a good balance between performance and safety. Copy snapshot files off the machine regularly: they protect against a restart, not against a lost disk.
Step 7: Optimize Redis Settings for a Dedicated Server
Cap memory. In redis.conf, put maxmemory below the physical RAM, leaving room for the OS and for the fork that writes snapshots. Then choose an eviction policy in the same configuration block: allkeys-lru for caching, noeviction when Redis is your primary database. In the caching case, Redis usually sits in front of a relational database such as PostgreSQL on a dedicated server; our MySQL and PostgreSQL comparison helps you pick that engine. Each setting is listed and commented in the default file, so read it once before you change anything.
Kernel settings. Redis logs warnings at startup when these two settings are wrong, and both are listed in the official tutorial:
sudo sysctl vm.overcommit_memory=1
echo never | sudo tee /sys/kernel/mm/transparent_hugepage/enabled
Make both persistent across reboots.
Scale with multiple instances. One Redis process uses one main thread for commands. To use more cores, create a Redis instance per port for each deployment, each Redis instance with its own configuration, each with its own config file and systemd unit, or turn on io-threads for network I/O. Each instance then gets its resources separately, managed as separately named services, and can scale on its own. For high availability, add replicas with Redis Sentinel, a feature that promotes a replica when the primary fails; for data sets larger than one machine, use Redis Cluster.
Step 8: Monitoring and Managing Redis (systemctl, logs, uptime)
- Service status:
sudo systemctl status redis-servershows whether the server is running and since when.
- Logs:
journalctl -u redis-serveror/var/log/redis/redis-server.log.
- Uptime and stats:
redis-cli INFOreportsuptime_in_seconds, memory usage, connected clients and the cache hit rate. That counter covers the Redis process only; for host-level checks from outside, see our guide to monitoring server uptime.
- Latency:
redis-cli --latencymeasures response time from the client side.
- Dashboards: Redis Insight, the free GUI from Redis, lets you search keys and shows live metrics, a better experience than raw commands. For alerts and integration with your management tools, the Prometheus
redis_exporterfeeds Grafana.
To monitor Redis over time, track memory usage against maxmemory, evicted keys and rejected connections. The community documentation helps you learn what each metric means; our maintenance checklist covers the routine around it, and our guide to configuring a Linux server covers the OS side.
Troubleshooting Common Issues
| Symptom | Likely cause | Fix |
|---|---|---|
| Could not connect to Redis at 127.0.0.1:6379 | Service stopped | Start it and read the log |
| NOAUTH Authentication required | Password set, client not authenticated | Use redis-cli -a or AUTH |
| DENIED Redis is running in protected mode | Remote client, no password | Set a password and bind address |
| OOM command not allowed | maxmemory reached with noeviction | Raise the limit or change policy |
| Fork or save failures | vm.overcommitmemory set to 0 | Set it to 1 |
After a fix, a quick server restart applies the change, and a ping confirms the result. Other tutorial resources from the Redis community cover rarer errors.
FAQ
How do I install Redis server on a dedicated machine?
Add the official packages.redis.io repository on Ubuntu or Debian, or Remi on AlmaLinux, run the install, then turn the service on with systemctl. Step 2 lists the exact commands.
Can Redis be self-hosted on my own hardware?
It can. Redis Open Source runs on any Linux platform, VPS or physical machine, and is free to use, with client libraries for every major language and a large community; the same libraries work against managed services and self-hosted instances alike. A physical machine gives it dedicated RAM and consistent latency.
Is Redis faster than using plain RAM for caching?
Not faster than RAM itself, since Redis keeps its data in RAM. It is faster than a disk-based database, and unlike an in-process cache, it shares data across multiple application servers and survives an application restart.
Can I host Redis locally without a cloud provider?
You can. Redis runs on your own machine with no account or license. On Windows, use WSL2 or Docker; Memurai is a commercial Windows-native alternative.
How do I secure Redis on a dedicated server?
Keep the bind address local, keep the default protection on, use a strong password or ACL users, and firewall port 6379 to your application services only.
What persistence options does Redis offer and how do I enable them?
RDB snapshots with the save directive, and AOF persistence with appendonly yes. A production deployment often uses both.
How can I monitor Redis performance and uptime?
Use the INFO command for uptime and memory, the latency mode of the CLI for response time, Redis Insight for a GUI, and a Prometheus exporter for alerts across your services.
Run Redis on bare metal Kimsufi dedicated servers from $11.10/month. Root access, fixed monthly pricing, built-in DDoS protection.