


Kubernetes runs best when it owns the hardware and can manage every resource itself. On bare metal there is no hypervisor and no virtual machine (VM) underneath your nodes: the kubelet, the container runtime and every pod get the full CPU, memory and storage of the machine. For a team running containers in production, that means steady performance under load, a fixed monthly cost instead of per-node cloud pricing, and full control over networking, security and the patch schedule. This Kubernetes setup guide builds a cluster with kubeadm, the official K8s bootstrap tool, from a fresh Linux dedicated server to a running app with TLS certificates and RBAC. You will prepare the OS, set up containerd, initialize the control plane, add pod networking, expose a sample application and secure the cluster, one section at a time. If you are new to bare metal, our guide on how to host a dedicated server covers the basics first. Plans begin at $11.10/month.
Key Takeaways
- The bootstrap tool needs at least 2 CPUs and 2 GB of RAM per node, swap off, and a unique hostname.
- Kubernetes no longer runs on Docker Engine: install containerd as the runtime, with the systemd cgroup driver.
- One machine can run a complete cluster: remove the control-plane taint so pods can schedule on it.
- Bare metal has no cloud load balancer. Use NodePort for testing and MetalLB for real LoadBalancer services.
- Tools required: SSH access with sudo, about 60 minutes, and a domain name if you want TLS.
Introduction
There are several ways to run Kubernetes on your own hardware. Lightweight distributions such as K3s fit everything in one binary. The official bootstrap tool takes the opposite approach: it sets up upstream Kubernetes, component by component, exactly as the project ships it. That makes it the reference platform for learning how a cluster works, and the most portable base when you later move workloads to another provider.
Why not a hosted Kubernetes service? Public cloud providers sell managed Kubernetes among their cloud services, billed per node, per load balancer and per gigabyte of traffic. Kubernetes on dedicated servers trades that convenience for cost efficiency and steady performance: a fixed monthly price, physical cores, and reduced latency, since no virtualization layer sits between your pods and the metal. It also fits a hybrid cloud, private cloud or multi cloud design, with the same cloud native tooling on your own infrastructure, which makes it a solid enterprise solution on a predictable budget. The trade-off is that your DevOps team runs the control plane instead of the cloud platform.
By the end of this Kubernetes cluster setup you will have:
- A control plane on a dedicated machine, with etcd, the API server, the scheduler and the controller manager.
- containerd as the container runtime and Flannel or Calico for pod networking.
- A sample application exposed on the network.
- cert-manager for TLS certificates and RBAC for access control.
The same steps work on one host or several. Adding a worker later takes one join command per node.
Prerequisites and Hardware Requirements
Hardware requirement. The minimum requirements for Kubernetes, according to the official documentation, are 2 CPUs and 2 GB of RAM per node, plus enough disk space for container images. That runs the control plane, not much else. Kubernetes resource requirements grow with what you run, so size the CPU/RAM/storage requirements on your real environment:
| Use | CPUs | RAM | Disk |
|---|---|---|---|
| Lab, one node | 4 | 16 GB | SSD |
| Small prod cluster node | 4 to 8 | 32 GB | NVMe in RAID 1 |
| Database-heavy services | 8+ | 64 GB | NVMe in RAID 1 |
Two Kimsufi configurations fit the Kubernetes cluster requirements of a first environment well, and their dedicated server specifications are below. The KS-1 dedicated server has an Intel Xeon-D 1520 with 8 threads and 32 GB of ECC memory. The KS-1-B dedicated server pairs an Intel Xeon D-2123IT with 32 GB of ECC memory, upgradable to 64 GB, and two NVMe SSDs in software RAID, which etcd appreciates. Both Xeon models are available in European data centers. A physical Xeon thread behaves very differently from a shared vCPU on a virtual machine: no other tenant competes for it, and no VM steals its cycles.
Software. A stable Linux server distribution, 64-bit: Kubernetes on Linux is the reference target. This guide uses Ubuntu 24.04 LTS on amd64; on other distributions, follow the installation instructions in the Kubernetes documentation.
Network. A public address, a unique hostname per node, and these ports open between nodes:
| Port | Protocol | Component |
|---|---|---|
| 6443 | TCP | Kubernetes API endpoint |
| 2379-2380 | TCP | etcd |
| 10250 | TCP | kubelet API |
| 10257, 10259 | TCP | controller manager, scheduler |
| 30000-32767 | TCP | NodePort services |
| 8472 | UDP | VXLAN overlay |
Setting Up the Dedicated Server (OS Installation)
Install Ubuntu 24.04 LTS for amd64 from the control panel template, as shown in our Ubuntu Server installation guide. Kimsufi will provision it in minutes, then send the credentials by email. Connect over SSH and open a root shell with sudo -i: the commands in this section and the next one run as root. Update the system and set a hostname:
apt update && apt upgrade -y
hostnamectl set-hostname k8s-cp1
If SSH ever fails, the remote console in the control panel gives you direct access to the machine. Use that console to fix network settings without a reinstall.
Disable swap. The kubelet expects swap to be off unless you configure swap support explicitly. Turn it off and comment out the swap line in /etc/fstab:
swapoff -a
sed -i '/ swap / s/^/#/' /etc/fstab
Kernel modules and sysctl. Pod networking needs bridged traffic to pass through iptables and IP forwarding to be on. Ensure both persist after a reboot:
cat <<EOF > /etc/modules-load.d/k8s.conf
overlay
br_netfilter
EOF
modprobe overlay && modprobe br_netfilter
cat <<EOF > /etc/sysctl.d/k8s.conf
net.bridge.bridge-nf-call-iptables = 1
net.ipv4.ip_forward = 1
EOF
sysctl --system
Installing the Container Runtime (containerd)
The project removed its built-in Docker support (dockershim) in version 1.24, so a Docker installation is no longer part of the setup. Docker Engine still creates images on your workstation or on a dedicated Docker host, but the cluster talks to a CRI runtime. containerd is the standard choice, and the one Docker itself relies on underneath. Our Kubernetes vs Docker comparison explains how the two tools split the work. Images built with Podman instead of Docker run the same way, since both produce OCI images.
Install containerd from the Ubuntu repositories and write its base config:
apt install -y containerd
mkdir -p /etc/containerd
containerd config default > /etc/containerd/config.toml
Ubuntu uses systemd as its init process, so containerd must use the systemd cgroup driver too. Set SystemdCgroup = true in that configuration, then restart the service:
sed -i 's/SystemdCgroup = false/SystemdCgroup = true/' /etc/containerd/config.toml
systemctl restart containerd
Type exit to leave the root shell before the next section.
⚠️ Warning A cgroup driver mismatch between containerd and the kubelet is the most common reason a fresh cluster never becomes Ready. Ensure this setting is right before you move on.
Installing kubeadm, kubelet, and kubectl
The three Kubernetes components come from the official Kubernetes repository at pkgs.k8s.io, which publishes one repo per minor release. Add the v1.37 repo and its signing key:
curl -fsSL https://pkgs.k8s.io/core:/stable:/v1.37/deb/Release.key | gpg --dearmor | sudo tee /etc/apt/keyrings/kubernetes.gpg >/dev/null
echo 'deb [arch=amd64 signed-by=/etc/apt/keyrings/kubernetes.gpg] https://pkgs.k8s.io/core:/stable:/v1.37/deb/ /' | sudo tee /etc/apt/sources.list.d/kubernetes.list
Then install kubeadm, kubelet and kubectl, and hold their version, so a routine apt upgrade never changes your cluster behind your back:
sudo apt update
sudo apt install -y kubelet kubeadm kubectl
sudo apt-mark hold kubelet kubeadm kubectl
Each package has one role:
- kubeadm bootstraps the control plane and joins nodes.
- kubelet is the node agent that runs pods. Its binary sits in
/usr/bin, managed by systemd.
- kubectl is the client you use to manage every resource in the cluster.
The kubelet restarts every few seconds until the cluster is initialized. That is expected, not an error.
Initializing the Kubernetes Control Plane
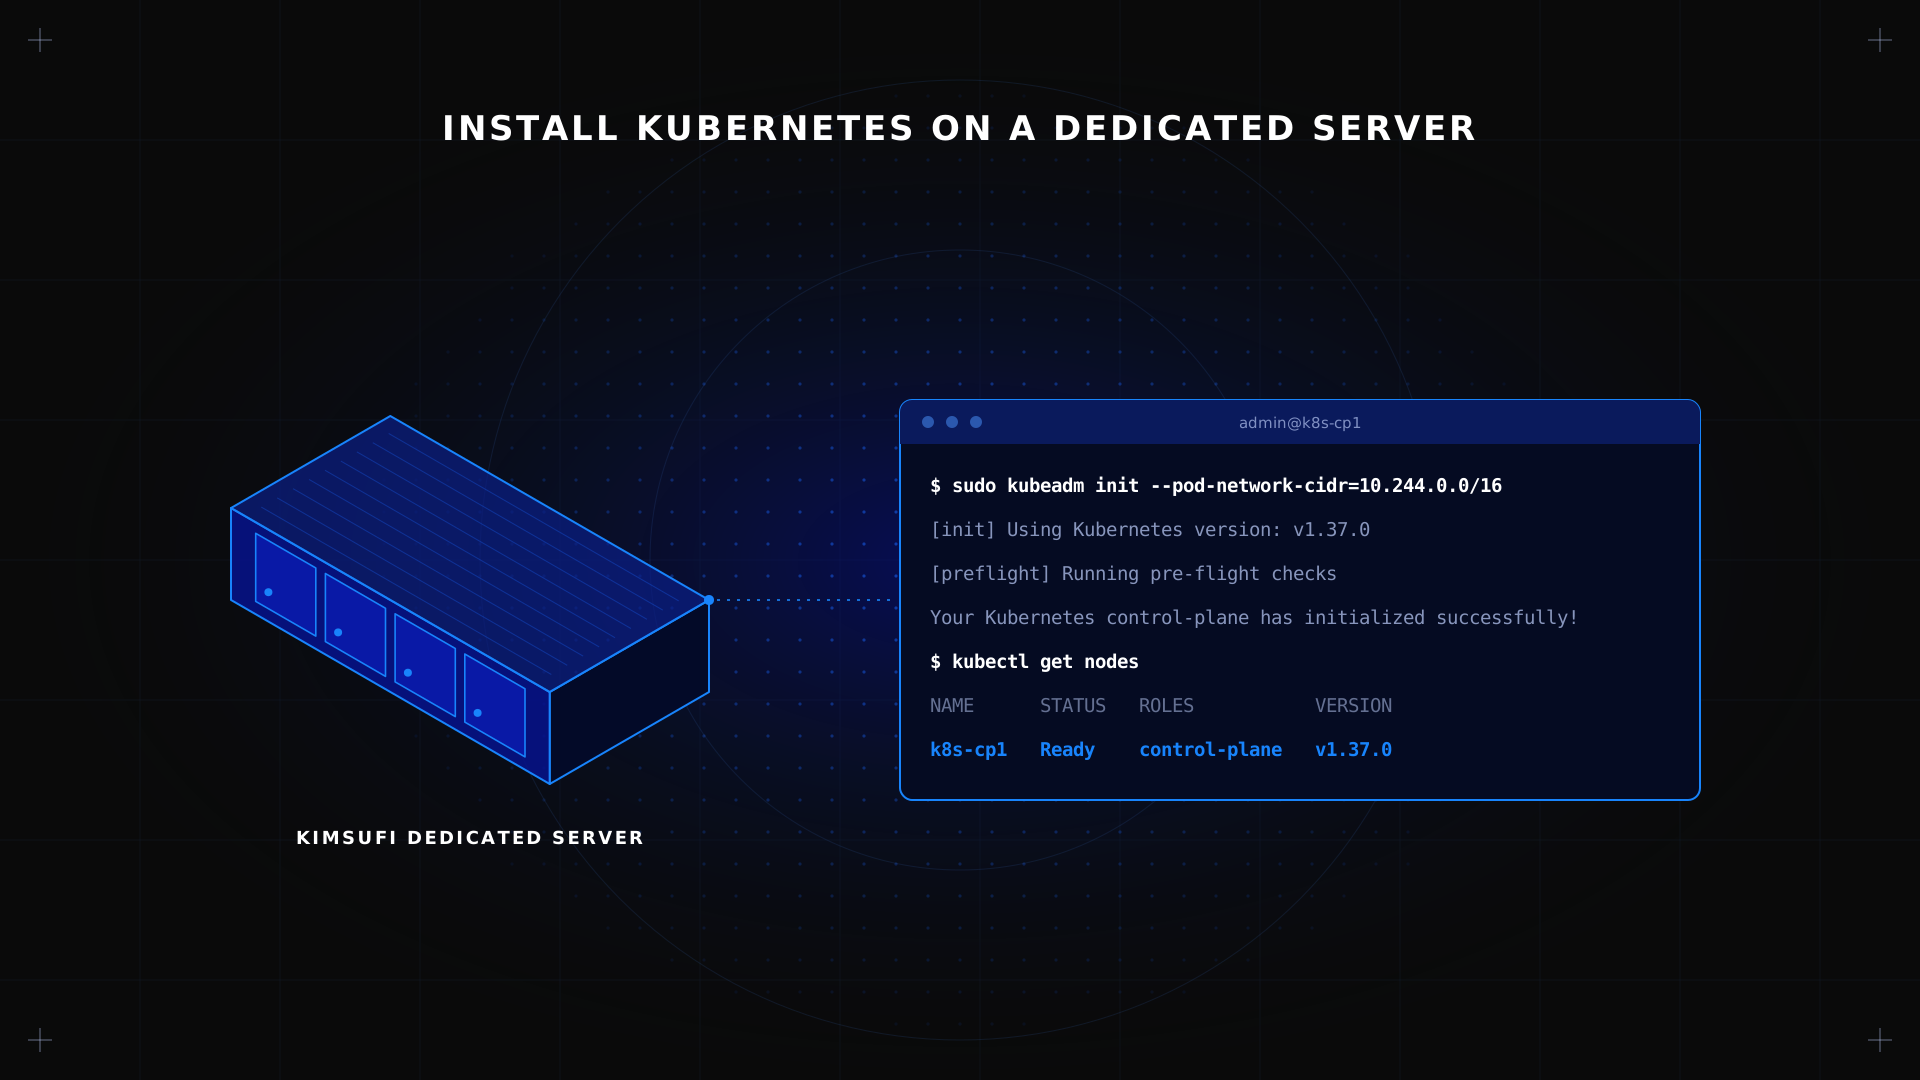
Initialize the control plane with the pod network range that Flannel expects:
sudo kubeadm init --pod-network-cidr=10.244.0.0/16The init process runs preflight checks, generates certificates, writes static pod manifests for the API server, controller manager, scheduler and etcd, then prints a join command with a token. Save that output: worker nodes need it.
Give your regular user access to the cluster, and export the config path for the current shell. Add the same export line to ~/.bashrc to keep it:
mkdir -p $HOME/.kube
sudo cp /etc/kubernetes/admin.conf $HOME/.kube/config
sudo chown $(id -u):$(id -g) $HOME/.kube/config
export KUBECONFIG=$HOME/.kube/config
Kubernetes single node setup. Out of the box, the control plane refuses ordinary workloads. On a lone dedicated server, remove that taint so pods can schedule:
kubectl taint nodes --all node-role.kubernetes.io/control-plane-Older Kubernetes master node setup guides use node-role.kubernetes.io/master instead. The master label was retired in favor of control-plane, so snippets copied from a master-era tutorial fail silently on current versions.
Configuring Networking (Flannel / Calico)
Kubernetes networking plugins, also called the network add-on, are not part of the init step. Until you install one, the node stays NotReady and CoreDNS pods stay pending. Pick one:
Flannel is the simplest. It builds a VXLAN overlay and works with the 10.244.0.0/16 range used above. Download its manifest from the project's latest GitHub release, then apply it with kubectl apply -f kube-flannel.yml.
Calico requires a few more steps but enforces NetworkPolicy, which the default overlay alone does not. Choose it if you need to restrict traffic between pods, for example to isolate a prod namespace. Create the Tigera operator, then a custom resource with the same pod CIDR.
Check the result:
kubectl get nodes
kubectl get pods -n kube-system
✅ Expected result The node shows Ready, and the CoreDNS, network plugin and proxy pods all show Running.
Deploying a Sample Application
Deploy a test workload with two replicas, expose it, and check the service:
kubectl create deployment hello --image=nginx --replicas=2
kubectl expose deployment hello --port=80 --type=NodePort
kubectl get pods -l app=hello
kubectl get svc hello
Browse to http://<node-ip>:<node-port> to see the nginx page. When both replicas are ready, your first Kubernetes deployment is live. Check the status at any time with the rollout status subcommand.
Load balancers on bare metal. In a cloud, type: LoadBalancer asks the provider for an external load balancer. On a dedicated server there is no cloud provider, so the service stays pending forever. Two options:
- MetalLB gives each LoadBalancer service an address from a pool you define, such as an additional IP routed to the server.
- An ingress controller such as ingress-nginx, exposed through MetalLB or on 80 and 443, routes many domains through one public address.
A MetalLB pool is a short manifest, loaded with kubectl apply -f pool.yaml once MetalLB itself runs:
apiVersion: metallb.io/v1beta1
kind: IPAddressPool
metadata:
  name: public
  namespace: metallb-system
spec:
  addresses:
    - 203.0.113.10/32
For a single node, the simplest design is to deploy ingress-nginx behind that load balancer: you deploy each new app as an Ingress rule, not a new port. The Gateway API, the newer successor to Ingress, follows the same idea with richer traffic routing and load balancing rules.
Securing the Cluster: cert-manager and RBAC
TLS with cert-manager. cert-manager requests and renews Let's Encrypt certificates for your Ingress resources. Load its release manifest; cert-manager will then require a ClusterIssuer:
apiVersion: cert-manager.io/v1
kind: ClusterIssuer
metadata:
  name: letsencrypt
spec:
  acme:
    server: https://acme-v02.api.letsencrypt.org/directory
    email: admin@example.com
    privateKeySecretRef: { name: letsencrypt }
    solvers:
      - http01: { ingress: { ingressClassName: nginx } }
Add the cert-manager.io/cluster-issuer: letsencrypt annotation to each Ingress. Point a DNS record for your domain at the node first, and ensure port 80 is reachable, or the HTTP challenge fails. cert-manager then handles every renewal on its own.
RBAC. Never hand out admin.conf. Create a ServiceAccount or user per person or pipeline, bound to a Role limited to one namespace:
kubectl create namespace prod
kubectl create rolebinding dev-edit --clusterrole=edit --user=dev@example.com -n prod
Firewall. Restrict port 6443 to your admin address and other nodes, and close etcd and kubelet ports to the internet. Our firewall configuration guide covers the rules.
Secrets. Enable encryption at rest for Secrets in the API server configuration file, since they are only base64-encoded in etcd by default.
Pod security. Label each namespace with a Pod Security Standards level, such as restricted, so the built-in admission policy rejects privileged containers. Together with RBAC and NetworkPolicy, that covers the basics of cloud security on your own cloud infrastructure.
Monitoring, Logging, and Scaling Considerations
Monitoring. Deploy metrics-server for live resource usage, then install kube-prometheus-stack with Helm for Prometheus, Grafana and alerting. Add Loki to collect container logs in the same Grafana dashboard, and watch storage usage on each device: logs grow fast.
Scaling. Scaling happens at two levels. Inside the cluster, a HorizontalPodAutoscaler adds replicas when CPU load rises. Outside it, you add nodes: install containerd and the three packages on a second dedicated server, then run the join command with the token saved earlier. That is the whole Kubernetes multinode cluster setup: the same steps on every worker.
Kubernetes management tools. Kubernetes cluster management day to day is easier with a terminal UI such as k9s or a desktop client such as Headlamp. Both read your kubeconfig, which kubectl config view displays, and that Kubernetes configuration file is all they need. Keep manifests in Git as infrastructure as code, so multiple people can review each change.
Upgrades. Kubernetes ships a new minor release about three times a year, each supported for roughly 14 months. Move one minor release at a time with kubeadm upgrade apply, after you unhold the packages, and ensure every node runs the same version before the next upgrade. Our guide to dedicated server maintenance covers the routine around it.
Backups and disaster recovery. Snapshot etcd regularly with etcdctl snapshot save and copy each snapshot off the node, ideally to S3-compatible object storage in another data center. Back up persistent volume data separately: etcd only holds cluster state. For high availability later, run three control-plane nodes.
Conclusion
This Kubernetes installation tutorial turns dedicated servers for Kubernetes into standard Kubernetes clusters in about an hour: containerd, a control plane, a network plugin and your first application. From there, the work is operational: TLS, RBAC, monitoring, backups and regular upgrades. Start with one node, and add more when your workloads require them.
Run your Kubernetes cluster on bare metal Kimsufi dedicated servers from $11.10/month. Root access, fixed monthly pricing, built-in DDoS protection.
FAQ
Is Kubernetes still relevant in 2026?
Very much so. It remains the standard platform for running containers at scale, backed by a large Kubernetes community, behind most cloud computing services, and supported by every major cloud provider and most on-premises vendors. What changed is that teams now pick lighter distributions such as K3s for small setups and keep full Kubernetes for production platforms.
Is 16GB RAM enough for Kubernetes?
For a lab or a small production cluster, it is. The control plane itself uses 2 to 3 GB. The rest depends on your applications: databases and Java services fill memory quickly, so 32 GB gives more headroom.
Why is K8s so hard?
Because it solves hard problems: scheduling, networking, storage and failure recovery across a fleet of hosts. This setup exposes each component, which is why it feels complex, and also why it is the best way to learn how a cluster really works.
Can I host Kubernetes locally?
You can run Kubernetes locally with kind, minikube or K3s on a laptop. They suit development. For anything other people rely on, a dedicated server gives you a public address, stable uptime and physical resources.
What are the minimum hardware specs for a dedicated Kubernetes node?
2 CPUs and 2 GB of RAM is the documented floor. A useful node starts at 4 CPUs, 16 GB of RAM and SSD storage.
How do I configure networking for a single-node cluster on a dedicated server?
Initialize with a pod CIDR, add a network plugin, remove the control-plane taint, and expose services through NodePort or an ingress controller on ports 80 and 443. Install MetalLB if you need LoadBalancer services.
What security measures should I apply when running Kubernetes on bare metal?
Restrict the API port, use RBAC instead of sharing admin.conf, encrypt Secrets at rest, enforce NetworkPolicy with Calico, keep every component patched, and back up etcd off the machine.